Tuesday, 21 March 2017

Butterfly Love

Hi everybody,

I just have to share with you my latest passion for the butterfly stamp set from Concord & 9th,


available from https://www.bumbleberrys.co.uk/
Butterly beauty set from Concord &9th


Look at this stamp set... what a fantastic design!


I tried to use the big butterfly stamps as the main focus on the card. I have used the brusho background since I have made so many A4 sheets the other week.


Thank you card on the brusho background. I used the foam pads to give butterflies a lift and dimension.


Happy Birthday card, I used the brusho background, Stamped and cut out the butterfly. I spray lightly water on the back of butterfly to soften the paper so I could shape it. It really makes a different.
In this card I heat embossed the butterfly, I used the clear embossing powder so the butterflies just have a soft shine. I cut two big ones and two small ones.
I have arranged the butterflies on the card and used foam pads for dimension.


In this one I stamped the butterflies on the separate card and used distress ink to colour them.


Coloured butterflies
I splashed gold starlights paint on the craft card backgroung.


 I also used the small butterflies stamps to create the bookmark.  I used distress inks for background.


I am sure you will love this set as much as me. There is SO much more to do with this set...

Thank you for reading,

Hugs,

Kasia

Monday, 20 February 2017

Avery Elle stamps


   New Avery Elle stamps
I have became a part of design team for Bumbleberry papercrafts.
The shop has a fantastic variety of craft products including Avery Elle stamps. This is my first time working with these stamps and I am already in love with the quality. They stamp effortlessly, no pressure needed.  


https://www.bumbleberrys.co.uk/


Punny Pantry Clear StampsThe cards below were made using this stamp set.

I have started with stamping I must apple-ogize stamp on the white card. The stamping was so addicting that I had to cover the whole card with random apples.

I stamp one apple on the separate card, cut out and colour red.

I use distress inks and water brush to colour my apples, i love this kind of colouring as it is giving me control over shading.

I use yellow distress on the edges , I do the same on the small card for a red apple.

I add some little hearts to send some love with apologies.


I have used the same technique to create a similar card with another stamp from this set... You're my butter half!


All crafty supply you can get from:
 www.bumbleberrys.co.uk

Sunday, 29 January 2017

step by step tutorial - TAG


Hello there, happy Sunday !
I would like to present you my first step by step tutorial, it took some times to put pictures together but I think the instructions are  clear and easy to follow.  
step by step tutorial below:


You need:
-watercolor card
- brusho powders ( I used Yellow, Lemon, Orange and Leaf Green)
- big background stamp ( by imagination Craft)
- grey or black ink ( I used versafine)
- distress ink
- gold paint ( I used a starlight paint by Imagination Crafts)
- bauble stencil and stippling brush ( or sponge)
- black card for matting, ribbon ( optional) and double sided adhesive tape 


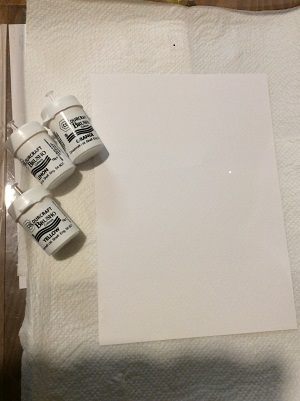
     Step 1: use watercolor paper and brusho powders in desired colours.
TIP: if you don’t have a watercolor card you can use regular card, brusho powder won’t ‘move around’ as on watercolor card but you still get an unique design.


   Step 2: sprinkle brusho powder onto the card


Step 3: spray the water onto the card


Step 4: keep adding water until you get the design want


Step 5: add a different  brusho powder ( optional)


Step 6: dried design will look a bit different from wet one. TIP: always work on bigger card than you need for your project, you can then cut out the piece of card you like.


Step 7: Cut the tag shape, simple cut the two top corners off. Stamp the side of the tag with big background stamp. TIP: you can use small stamps if you don’t have a one big stamp, I used grey ink as I did not want the sharp look. If you want the words to stand out a bit more use a black ink.

Step 8: I used a matching distress ink to create faded bauble pattern, the more random the better J


Step 9: Using the same bauble stencil I used gold starlight paint in random places again. Stippling brush is the best to use but if you don’t have one use a makeup sponge.


Step 10: use the same distress ink on edges


step 11: stamp the desired words on the separate card.  TIP: you can use any words stamp. Using single letter stamps allow to stamp any word you need.


Step 12: mat the tag on the black card and add cut out words


                                                   Add the ribbon if desired


Hope you enjoy my step by step tutorial.
Any question please leave the comments.

Happy crafting to you all...


Kasia


Find me on Facebook:

https://www.facebook.com/Handcrafted-by-Kasia-KC-LaCraft-580015498778303/

Saturday, 7 January 2017

DT samples 'For the love of stamps'

Hello everyobe and happy new year,

I just want to share with you some of the latest DT samples I made for today's launch of Hunkydory stamps.

There are on special offer on C&C now so it is the best time to get them.


Firstly cards with cross... my favorite from this collection. This one is stamped and coloured, matted on gold mirri cards.


My second cross is on the craft card. I stamped cross and used gold embossing powder. I coloured the cross with gold mica powder.
I love this card...
This card is butterfly card. I used distress inks to create the background and stamped with black ink.
 

Another butterfly card, this time on the craft card. 

Happy crafting, 
Kasia 

Saturday, 31 December 2016

Happy New Year... my last card this year

Hello crafters in this last day of 2016.

I bet you all have plans and looking forward to tonight.
I had a bit of time and wanted to make my last card this year with the stamp I had for a while but never got to use it..
I used 7x7 white base card.


It is a beautiful Lily stamp. I used my sparkle pen to colour the lily, pity you cannot see that on the photo.


I used distressed ink to create the shading on the edges.  I matted and layered the picture on grey card and again on gold mirri card.


I used masking technique to stamp the words behind the Lily.

I think it a lovely change from all the Christmas cards i was recently making.

The colours make me think of Spring and look forward to 2017.


Have a fantastic 2017 everyone,

Crafting hugs,

Kasia

Sunday, 25 December 2016

Merry Christmas and a Happy new year to all.
This is probably my last post this year so wanted to share with you so more Christmas cards when season is still on.
And another one...
Bring on 2017! Can't wait for wonderful things waiting to happen.
Crafting hugs,
Kasia


Monday, 19 December 2016

Morning crafters...

2016 has been a good year for me as a crafter... I have learnt so many new techniques and started my DT job with Hunkydory 's stamp collection.... DT was and is a challenge as I was  not experienced in a picture/build a story stamping... but I was given a chance and I am greatful...next time I will share with you all my favorites from my DT samples but today just want to stay with a Christmas theme...

Above you see one of my Christmas cards this year.... all Christmas trees are stamped... gold one is heat embossed... and all matted and layered ... for a glitter border I used double sided adhesive and sprinkled with blue glitter. It is a great way of creating borders and saving as you only use a strip size of that not a full card...


This is my favorite from last year cards... I love the die cut baubles that I foam padded back in a center of the card with silver mirri backing... the Christmas wreath die cut was dismantled and placed around bauble. I added some glitter snowflakes and white corners...  hope you like that....


Have a great last few days of 2016...

Crafting hugs,

Kasia


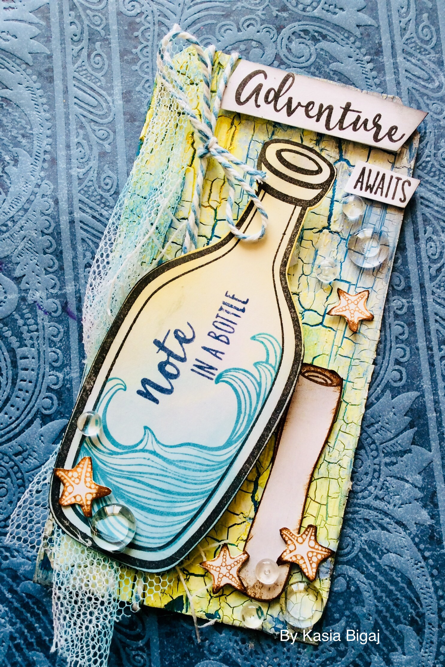
Honey Bee stamp - adventure awaits

Hello everyone, Today I have a step by step tutorial how I created this adventure await tag. I used the tim holtz mixed media tag...