Monday, 20 November 2017

Never stop making wishes for IDC

Hi everybody,

Today I bring you my card using Never Stop making wishes stamp set by IDC.


This is my card.


I used the distress inks to create the background.
When I was happy with the background I place the oval card in the middle and stamped my images. I did that so I can match the images after adding the gold mat.

I used the teal liquid glitter to add the drops all over the card.


Add the sentiment.

Mat and layer onto the gold card and the onto the blue one and gold again.


Hope you like my card.

Kasia 

Saturday, 18 November 2017

Modern tree for Bumbleberry Papercrafts

Morning everybody,

I just like to share with you my new card I made using modern trees set by MFT,
 I made this card :


Steps:
Use thorn piece of paper to mask of the side of the card. I used the same piece on top and bottom of the card. Use distress inks to colour the middle part of the card. I moved the thorn paper a bit and added another colour on both sides.
I splatted few drops of water and dabbed them off with a tissue to bleach the middle part of the card.

Stamp the trees with black ink, dont forget second and third generation trees around as well.
Add leaves.

Add colour to the top of the card - yellow distress and to the bottom - brown distress.
Doodle the boarder and some lines for trees' bottom so they are not floating in the air.

The sentiment is from Concord and 9th Beautiful Butterfly set.

Hope you like it
Enjoy your weekend 

K


Thursday, 16 November 2017

Pretty Gets Gritty .dt video

Hi everybody
The Pretty Gets Gritty is coming back sooner I will be posting my new projects soon.

These are the samples for the previous shows.
I really love how hochanda has shown my projects so I made a little video to keep it.

Enjoy and let me know what you think,
kasia x

Saturday, 4 November 2017

Creative freedom


Hello crafty friends,
Today I have inspiration for a Bumbleberry Papercrafts ,
I created this card
I used the creative stamp set by The ink road.
I enjoyed working with this stamp set and the quality of stamps is superb.
How did I make a card:
Start with a white, blank card - I use Sheena stamping card for all my colour mediums.
Wet the card with water ( spray or brush is fine), use the flat brush to apply the sparkle pens - yellow,orange and red. Blend and spread the colour , kind of ombre  effect.... from the darkest shade on  the bottom to the lightest, almost pale cream at the to of the card.
When background is ready , stamp the wreath stamp and colour. I stamped the brush as a frame and little flowers from the same set. 

I coloured few brushes, stamp the big sentiment in the corner, on the separate card stamp the little sentiment and adhere ( using foam pads) to the middle of wreath.  


Finally,
I stamped and cut out scissors and brush and added them to card. I added few gold dots to the middle of the flowers and corners of the card.
Few mats and layers and 7"x7" cards is ready.
Happy stamping and creating,
Kasia 

For all your  US stamps and crafty essentials got to Bumbleberry Papercrafts.

www.bumbleberrys.co.uk

Saturday, 21 October 2017

The Ink Road stamps for Bumbleberry Papercratfs


Hello everybody, 
My quick card today...
How to make it:
Take about 20 mins to put together...
You need few  things: Watercolour card and stamp set by  The Ink Road , distess Oxide inks...

Choose three oxides...
Stamp the oxide pad on the watercolour card, press firmly... repeat with 2 others colours.
Spray with water, not too much... I think 2-3 sprays should be enough otherwise the ink will bleed all over the card.
Wait for the ink to dry or use a heat gun if you are impatient  like me...
I used fake stitch to stamp inside the square and added hash tag stamps... Art is life is the main stamp I really like... 

I doodled the frame, mat and layer and card is ready...
Love this stamp set ...
there are more stamps from Ink Road available here.https://www.bumbleberrys.co.uk/collections/stamps/new-the-ink-road
Bumbleberry is the only place you can get them in the UK. 

Happy Saturday,

Kasia xxx

Tuesday, 17 October 2017

Pretty Gets Gritty Collection

Hi everybody,
I would like to share with you my latest projects I made for Pretty Gets Gritty by Lynette Jasper brought by the Craftbuddy.

I created mixed media pieces that with the beautiful products I simply adore. They were all included in the craft boxes that Lynette put together.
Have a look at my projects and judge it yourself.
You can also follow Lynette on FB as she will surly bring more of those beauties soon.

I loved working with those products...


Hugs and crafty blessing,
Drop me a comment if you like my projects.
Kasia
xxx

My canvas for Imagine Design Create

Canvas
This is my canvas with Birds and Trees 6x6" Stencil / Mask by Imagine Create Design.

Step by Step:
1.       Use structure paste through the stencil. Let it dry.
2.       Add colour. I used oxides. I picked the colour with a brush from the glass mat.

3.        Spray with a water.

The colour did not spread as I wanted so I decided to start picking the droplets of oxides from my craft mat by dabbing my canvas onto them. I dried each layer. It took me some time till I was happy with a colour.

4.       I even added some  PINK oxides . Keep layering the oxides till you happy.


5.       After all that my structure paste was not white anymore and I could not clean it.
I placed the stencil back in the same place and dabbed the gold paint through. I did the same to all 3 trees.
I used golden pain to stencil the bird as well. I used the black pen to add highlight to the trees and birds.
I used the  Star Frames 6x6" Stencil / Mask to add little stars.
Finally, I stamp the sentiment and heat embossed it.


Hope you like my project and have a go with canvas and oxides.
Kasia

x

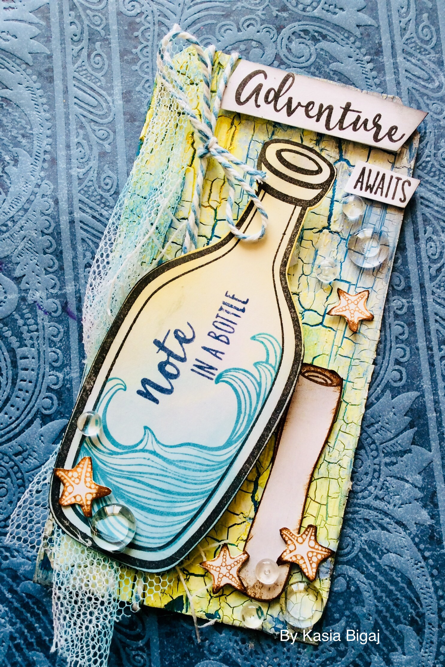
Honey Bee stamp - adventure awaits

Hello everyone, Today I have a step by step tutorial how I created this adventure await tag. I used the tim holtz mixed media tag...