Thursday, 12 October 2017

DT sample for Imagine Design Create - Bird and Tree stencil


Hello Everybody,
Today I present the card I made using new Imagine DesignCreate stencil.


Bird and Tree stencil is square 6”x6” but it does not matter what card you want to put it on. My card is A5 size ( Half of A4).
The background is made using three colour of sparkle pens – yellow, orange and red. Firstly I wet a watercolour card and than used brush strokes to add and blend colours.


I dried the background, and spattered some of the sparkle pens onto the glass matt and picked the drops with a background paper. I did it few times till I was happy with the results. Make sure you dry each layer.

I used black oxides to stencil through. I used one big tree and 3 small ones, slightly overlapping. I added some ground for tree so they won’t be floating in the air.
I added 3 birds and the sentiment vertically.
Enjoy and have fun with stencils.


Kasia 

Saturday, 23 September 2017

Modern trees twist

Hi Everybody,

This time  used Modern tree stamps  by MFT as a border not as a main image.
The background is made by layering Distress Oxides, I used the same colours to stamp trees around my DL card, don't forget to do some second generation stamp too.

'Love' is die cut from my stash, 'You' comes from the stamps set from Neat &Tangled.

Added some silver pearl drops for  some texture.
Crafty hugs and love,
Kasia 


Sunday, 17 September 2017

Modern tree- autumn card

Hello everybody,
This is inspiration for Bumbleberrys papercrafts.
I have combined few stamp sets for this card and used Oxides to create the background.


I started for layering oxides onto the watercolor card. It takes time to built up the layers, make sure you dry each layer before applying next one. Most of the time the results are unpredictable and sometimes surprising. Keep adding layers till you happy with the final results.

Stamp the bare tree onto the fully dried background. I used the single leave stamp only to create the autumn scene. Add the sentiment that suit the card. I thought this one was a good match for this card.
Have a go with oxides... they are so much fun, Not only good for background, Fab for some multicolored stamping.

Happy creating ,
Kasia


I used these sets:available here 
available here


Monday, 11 September 2017

Christmas Card for Imagine Design Create

 Hi everybody,
Today I am going to show the process of making this Christmas card using the Peace Tree stamp set and Festive boarder set from Imagine Design Create.
1. You need 6"x 6" white base card and two smaller white square card. 
Stamp the snowflakes from a Festive boarder set, use versa mark and white embossing powder and heat emboss. Stain the edges using light  blue oxides. 
2. Stain the edges of larger white card using dark blue shade and stamp the holly around.


3. Stamp the tree with versamark and heat embossed. I used one of the paper from IDC paper pad.
4.Mat and layer each panel onto the white card. Stamp Peace sentiment and add some white embellishments.


Saturday, 9 September 2017

MFT Modern trees cards

Hello everybody,

Today I would like to share my card I made using My Favorite Things stamp set - Modern Trees.
Available to buy from Bumbleberry papercrafts.


Firstly I used my distress inks and oxides to create the orange background. Matted and layered onto the black card.
I stamped the trees in a Versafine onyx black. 
Ps I actually stamped the wrong leaves onto the  the middle tree but please do not tell anybody. lol

I did not changed it cos I did not mind...ha...


The sentiment is from Altenew stamp set- available here.

Hope you enjoy my card and drop me a comment below .

Happy Stamping

Kasia 

Saturday, 26 August 2017

Arabesque card

Morning everybody,

I would like to show you  how I made this Arabesque Medallion card using Altenew stamp set available from Bumbleberry Papercrafts.
1. To get a clear stamp image I used a stamping platform as it is a large size stamp.

2. Match the solid stamps to image and stamp using colour inks of your choice. I used the distress inks, manage to get quite solid colour thanks to stamping platform.
3. The main image is stamped onto the 6"x 6". Stain edges of the card with distress inks. Mat onto the black card. Get another card ( pink) a bit smaller that the 7" base and mat this card onto the black card too.
Finally, add the sentiment ... I used "thank you" form this set.
buy here


Hope you enjoy my little pictorial, any question or comments please ask...

God bless ,

Kasia


Wednesday, 2 August 2017

Brusho inspiration

Hi fellow crafters,

Today I  want to present my brusho inspiration. I was very skeptical about this magic powder but after one use I fell in love with brusho and the love continues.

Try to use good quality watercolor card to allow brusho move easily on the card. You can sprinkle brusho powder first and spray water or you could spray the card first (generously) and sprinkle the powder. Choice is yours or better try both methods because you will get different results. Created backgrounds are never the same. Always unique style! That's why I love brusho.
Let me show you few cards with brush background.


Hope you like my brusho inspiration and will give a go.
Hugs,
Kasia

This is how every background begins...brusho powders, cards, water...


Honey Bee stamp - adventure awaits

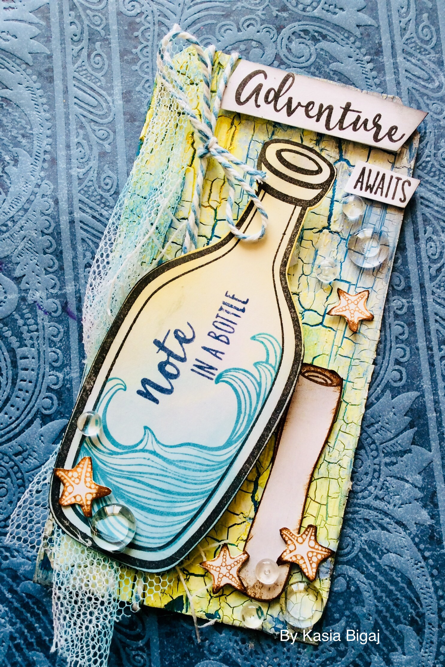
Hello everyone, Today I have a step by step tutorial how I created this adventure await tag. I used the tim holtz mixed media tag...