Saturday, 27 May 2017

Rainbow hello

Morning All,

It has been a sunny week so I decided to  use this colourful background for this card.

To create the background you need to cut lot of colourful paper strips, roughly 0.5 cm width.
Use the double sided adhesive sheet to cover the square card ( a bit smaller than 6x6 card). Add strip by strip to fill the whole card, cut the sticking out access. You can trim the square to the size you need.
Mat and layer onto black card and later onto the gold mirri card.

Stamp the flowers and leaves on separate card, cut them out. I used Avery Elle stamps. ( click to see)

Lastly , add the sentiment of your choice, I cut 'Hello' from the black card and gold mirri. I layered black onto the mirri card, leaving the gold boarder on the sentiment.

Don't forget to pop in to Bumbleberry shop to get your crafting essentials

Have a fantastic bank holiday 
Hugs and craft on 

Kasia 
 

Saturday, 20 May 2017

Neat ans Tangled stamp - DT samples

 Morning Everybody,

Morning All,
Today I want to present the card I made using Neat and Tangled stamp available from :
 https://www.bumbleberrys.co.uk/


1, Stamp the main image using clear embossing ink (Perfect Medium is my choice) and cover the image with white embossing powder. Use the heat gun.
2. Use distress inks of your choice to go around the edges and blend them.
3. Mat and layer onto the black card.
4. Repeat the blending on the egdes of the bigger card, mat and layer onto black card as well,
5, Use the triangle stamp from the set to stamp around the main image.
6. Stamp the sentiment, mat and layer onto black card and adhere onto the main panel using foam pads.

Stamp set you need:

click here to purchase.

There are some other cards I created using the same stamp set. 
How different each one is.


Enjoy crafting ,

Kasia


Balloons flower- DT card for Imagine Design Create


Stamped Balloons to create a flower, Imagine Design Create Stamps


I  used the large Birthday balloon stamps to create this fabulous flower.

To make this card you will need  the Birthday Balloons  Large stamp set and Abstract border lines.
1. Stamp middle size balloons on the separate card as you will have to cut them out.

2. Use darker shade ink to stamp small balloons inside the middle ones.

3.For the main panel use a cream card an inch smaller than DL size leaving a space for black mat.  Use the bauble lines from the Abstract border lines stamp set to create the background pattern. Colour random baubles.

4. Stamp few small balloons in green for petals. Mat and layer the main sentiment from the Birthday Balloons  Large stamp set, you can half the sentiment as it fits better on the DL card.


5.  Use another border line to stamp around the edge.
For this project you need:

Enjoy and visit the shop for all your crafty essentials
http://www.imaginedesigncreate.co.uk/

Kasia 

Sunday, 14 May 2017

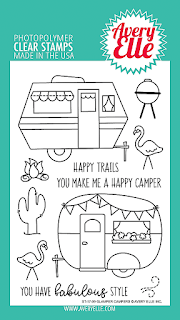
Avery Elle Glamper Campers stamp... sunset

Morning to all and  lovely Saturday,

I would like to share with you this card today:


The  main focus of the card is a sunset hence I left the stamps plain. To create a sunset use the circle white card, make sure is good for blending distress inks.
Start from placing the round mask in the middle for a sun. Start working with the lightest inks first, leaving the darker ones to very end to go round the edges.
Create a gold frame by cutting the gold mirri circle card in half and placing underneath the main circle. 
The stamps are cut out and left uncolored. I tried with coloured ones but it did not work for me. The card was simply too busy.
Mat and layer onto the black and gold card at the end.

Add the sentiment from the stamp set:
Few things that you need:
Blending tools for distress ink

Have a great Saturday and visit the online shop for all your crafty essentials.


Click here to visit the shop


Saturday, 6 May 2017

Believe in Yourself for Imagine Design Create

Hello crafters, Have a look at step by step how to made this lovely card using Reach for the star stamp set by Imagine Design Create .
1. Use watercolour card (I work on  A4 size so I can always choose the part of the card that I need for a particular project and in the same time I have some readymade background left for the next sample).  Sprinkle randomly your chosen brusho powders and spray with water. Use as much water as you need to achieve the desired look.  Your creation will be unique each time.

2. Cut the background  an inch smaller than A5 card, leaving the remaining inch for black and gold matting cards.

3. Use silver gold Starlight paint with a stencil. In this project I used Mini Orion stencil by Imagination Crafts.  Stipple the paint through, using a  big, round brush.

4. Use distress ink -seedless preserve- to add colour to the edges.

5. Stamp the main IDC sentiment and stars stamp.


6. Mat and layer ready background onto the black card and then onto the gold mirri card to create a frame. 


Have a great weekend.

Kasia 

Honey Bee stamp - adventure awaits

Hello everyone, Today I have a step by step tutorial how I created this adventure await tag. I used the tim holtz mixed media tag...