Hello there, happy Sunday !
I would like to present you my first step by step tutorial, it took some times to put pictures together but I think the instructions are clear and easy to follow.
 |
| step by step tutorial below: |
You need:
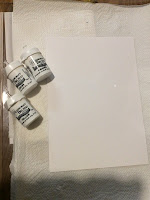
-watercolor card
- brusho powders ( I used Yellow, Lemon, Orange and Leaf Green)
- big background stamp ( by imagination Craft)
- grey or black ink ( I used versafine)
- distress ink
- gold paint ( I used a starlight paint by Imagination Crafts)
- bauble stencil and stippling brush ( or sponge)
- black card for matting, ribbon ( optional) and double sided adhesive tape
Step 1: use watercolor paper and brusho
powders in desired colours.
 TIP: if you don’t have a watercolor card you can use
regular card, brusho powder won’t ‘move around’ as on watercolor card but you still
get an unique design.
Step 2: sprinkle brusho powder onto the card
Step 3: spray the water onto the card
Step 4: keep adding water until you get the
design want
Step 5: add a different brusho powder (
optional)
Step 6: dried design will look a bit different
from wet one. TIP: always work on bigger card than you need for your project,
you can then cut out the piece of card you like.
Step 7: Cut the tag shape, simple cut the two
top corners off. Stamp the side of the tag with big background stamp. TIP: you
can use small stamps if you don’t have a one big stamp, I used grey ink as I did
not want the sharp look. If you want the words to stand out a bit more use a
black ink.
Step 8: I used a matching distress ink to
create faded bauble pattern, the more random the better J
 Step 9: Using the same bauble stencil I used
gold starlight paint in random places again. Stippling brush is the best to use
but if you don’t have one use a makeup sponge.
Step 10: use the same distress ink on edges
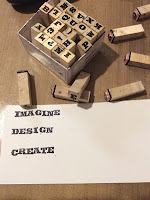
step 11: stamp the desired words on the separate
card. TIP: you can use any words stamp.
Using single letter stamps allow to stamp any word you need.
Step 12: mat the tag on the black card and
add cut out words
Add the ribbon if desired
Hope you enjoy my step by step tutorial.
Any question please leave the comments.
Happy crafting to you all...
Kasia
Find me on Facebook:
https://www.facebook.com/Handcrafted-by-Kasia-KC-LaCraft-580015498778303/
Kasia
Find me on Facebook:
https://www.facebook.com/Handcrafted-by-Kasia-KC-LaCraft-580015498778303/


